Bootstrap Tabs Set
Intro
Sometimes it is really pretty useful if we can certainly simply just place a few segments of information and facts sharing the very same space on web page so the site visitor easily could browse through them with no actually leaving behind the screen. This gets quite easily achieved in the new 4th version of the Bootstrap framework with the help of the
.nav.tab- *Ways to apply the Bootstrap Tabs Border:
First of all for our tabbed control panel we'll need to have a number of tabs. In order to get one generate an
<ul>.nav.nav-tabs<li>.nav-item.nav-link.activedata-toggle = “tab”href = “#MyPanel-ID”What is certainly brand new in the Bootstrap 4 framework are the
.nav-item.nav-link.active<li>Now once the Bootstrap Tabs Border system has been simply created it's time for designing the panels keeping the actual content to become featured. First we need to have a master wrapper
<div>.tab-content.tab-pane.fade.active.in.fade.tab-panelid = ”#MyPanel-ID”You can likewise build tabbed panels working with a button-- just like appeal for the tabs themselves. These are in addition named as pills. To perform it just ensure that in place of
.nav-tabs.nav-pills.nav.nav-linkdata-toggle = “pill”data-toggle = “tab”Nav-tabs tactics
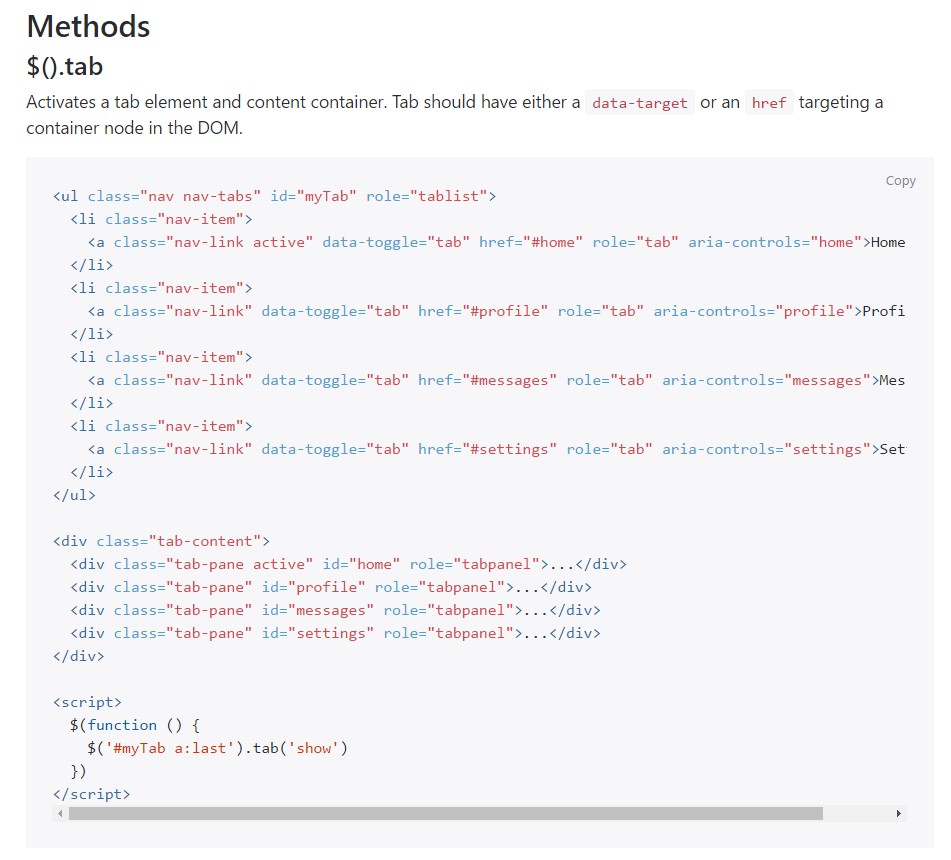
$().tab
$().tabTriggers a tab component and material container. Tab should have either a
data-targethref<ul class="nav nav-tabs" id="myTab" role="tablist">
<li class="nav-item">
<a class="nav-link active" data-toggle="tab" href="#home" role="tab" aria-controls="home">Home</a>
</li>
<li class="nav-item">
<a class="nav-link" data-toggle="tab" href="#profile" role="tab" aria-controls="profile">Profile</a>
</li>
<li class="nav-item">
<a class="nav-link" data-toggle="tab" href="#messages" role="tab" aria-controls="messages">Messages</a>
</li>
<li class="nav-item">
<a class="nav-link" data-toggle="tab" href="#settings" role="tab" aria-controls="settings">Settings</a>
</li>
</ul>
<div class="tab-content">
<div class="tab-pane active" id="home" role="tabpanel">...</div>
<div class="tab-pane" id="profile" role="tabpanel">...</div>
<div class="tab-pane" id="messages" role="tabpanel">...</div>
<div class="tab-pane" id="settings" role="tabpanel">...</div>
</div>
<script>
$(function ()
$('#myTab a:last').tab('show')
)
</script>.tab(‘show’)
.tab(‘show’)Chooses the delivered tab and reveals its own involved pane. Other tab that was previously chosen becomes unselected and its related pane is covered. Returns to the caller right before the tab pane has actually been revealed (i.e. before the
shown.bs.tab$('#someTab').tab('show')Activities
When showing a brand-new tab, the events fire in the following order:
1.
hide.bs.tab2.
show.bs.tab3.
hidden.bs.tabhide.bs.tab4.
shown.bs.tabshow.bs.tabIn the event that no tab was already active, then the
hide.bs.tabhidden.bs.tab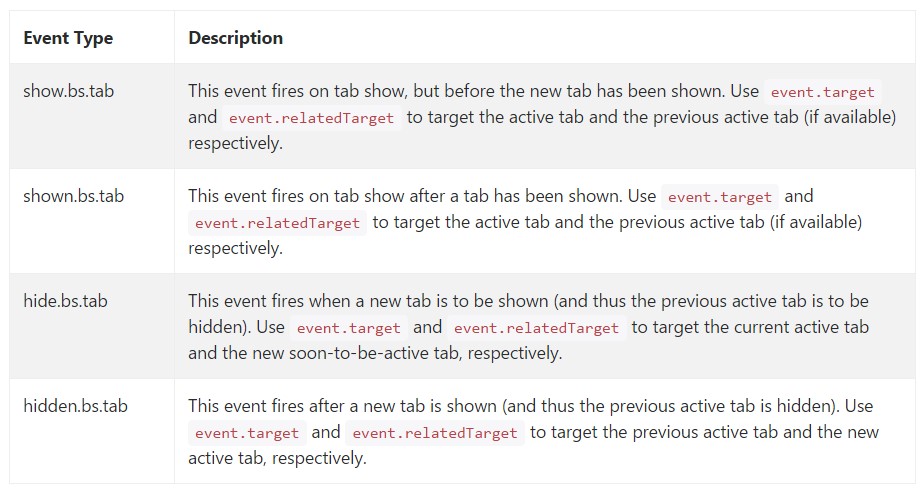
$('a[data-toggle="tab"]').on('shown.bs.tab', function (e)
  e.target // newly activated tab
  e.relatedTarget // previous active tab
)
Final thoughts
Well fundamentally that is simply the manner in which the tabbed control panels get made utilizing the most recent Bootstrap 4 edition. A point to pay attention for when setting up them is that the other components wrapped in each and every tab control panel should be essentially the same size. This are going to assist you stay clear of several "jumpy" behaviour of your webpage when it has been certainly scrolled to a particular location, the website visitor has started looking via the tabs and at a specific place gets to open a tab having extensively additional web content then the one being simply viewed right prior to it.
Review a few on-line video tutorials relating to Bootstrap tabs:
Related topics:
Bootstrap Nav-tabs:official documents
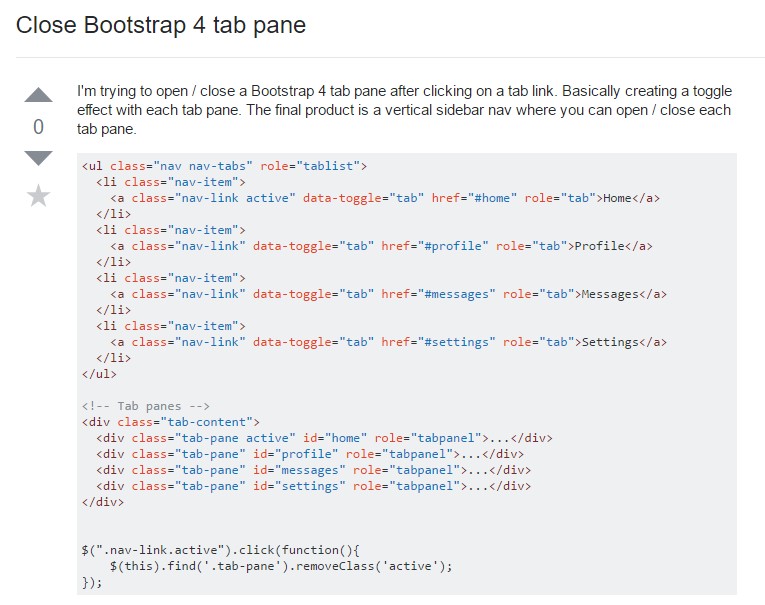
How you can close Bootstrap 4 tab pane
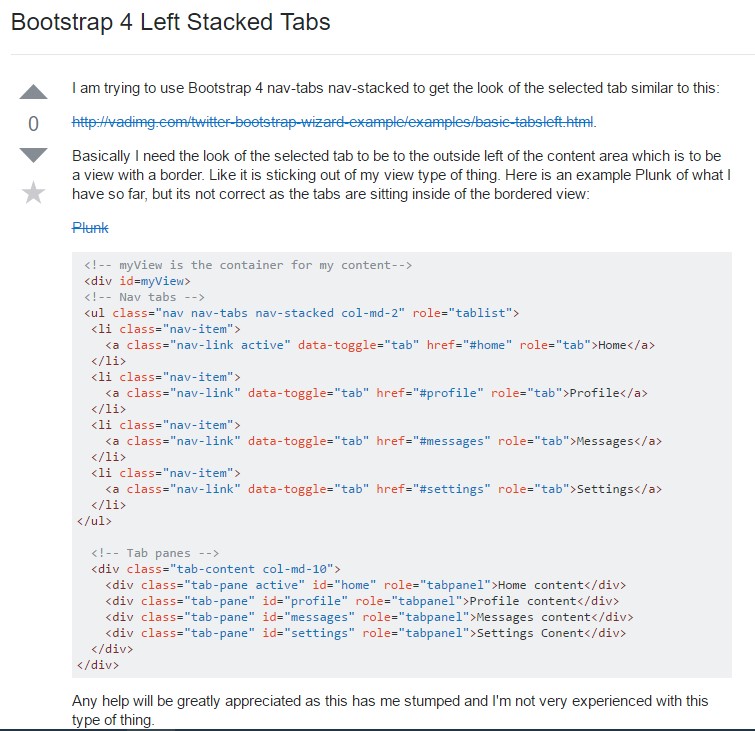
Bootstrap 4 Left Stacked Tabs